
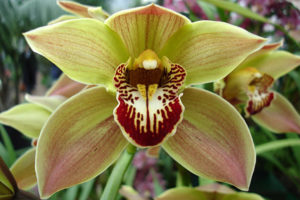
Orchids are beautiful and graceful flowers. Orchids come in multiple colors, shapes and sizes. Did you know that there is over 22,000 species of orchids? Care requirements vary based on the type. Regardless of which orchid type you may have you can follow some easy steps to keep your orchid looking healthy and fresh.

Here are some easy steps you can take to create the perfect environment for your orchids:
- Use pots with drainage holes. It is very important your orchid pots are equipped with drainage holes for excess water to run out. You don’t want root rot to kill your beautiful orchid!
- Place your pots near south or east facing windows if possible. Orchids require strong but indirect light to thrive. If you don’t have a window facing south or east your next best option is placing them by a window with a west view. However due to increased sunlight from west views please ensure you keep a sheer curtain on the window to avoid your orchid getting burnt. North views may not provide your orchid enough light to bloom.
- Maintain a temperature of 16-24C in your home or office. Orchids do extremely well in modest temperatures. They will die if it gets too cold. Correct temperature varies based on the species of your orchid but in general if you keep your home at 16C your orchids should do just fine.
- Provide your orchids with gentle air circulation to keep the roots healthy. In mild months you may open windows in your home for a gentle breeze.
Now that you have some general knowledge on creating the perfect environment for your orchids to live a long life we would like to go over watering, feeding and pruning your orchids.
- Water your orchids before they go dry. Inside your orchid pot the orchid should have a plastic clear pot with holes in the bottom. Remove the exterior pot and place the plastic pot in a bucket of water. Allow the orchid to soak for approximately five minutes before removing it from the water. Allow the orchid to drain and then place your plastic pot back into the original pot.
- Fertilize your orchids once per month while they’re flowering. Use a balanced liquid fertilizer, mix it at half strength and feed the orchids once per month. Do not water them within several days after fertilizing or the nutrients will leach out with the water.
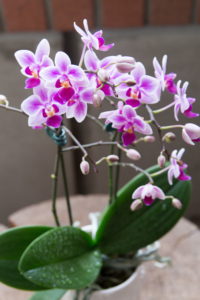
- Cut off stems when the flowers have died. Most orchids don’t flower more then once on the same stem with the exception of the Phalaenopsis.
The last thing we would like to share with you is what you can do if your orchids become diseased or infested with bugs and pests. Bugs and pests are not good for your orchids.
- If you see any insects remove them immediately by hand. Signs of insects may be sticky leaves and black mold. Use your hands to remove all the visible insects on the top and underside of the leaves and flower stalks.
- Clean the affected leaves with soapy water. Add a squirt of dish soap to a cup of room temperature water, dip a soft cloth in the solution and gently wipe down each leaf and flower stalk. The soapy water will remove the stickiness and will kill any remaining insects.
- If these problems persist, spray your orchid with insecticide. If you did step 1 and 2 but insects still persist, visit your local garden center and ask for help picking out an insecticide that is safe for orchids.
- If you notice that your orchid has discolored leaves or spots on them, it is likely suffering from a disease. Remove as much of the infected tissue as possible. Use a sterile cutting tool to cut away the diseased leaves, stems and flowers. After cutting away the diseased tissue, spray your orchid with fungicide or bactericide. You may find these products at your local gardening center.